Matrix Orbital (Linux)
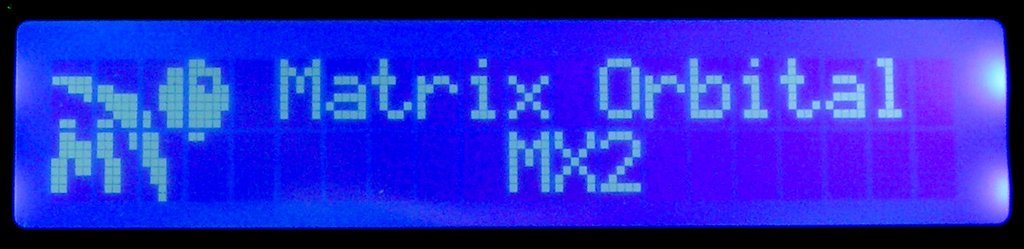
Using a Matrix Orbital MX2 (LK202-24-USB) under Linux from Perl
This information is from 2005, so it may be very out of date.
I struggled for hours to get one of these working. I know quite a bit about Linux from a system administration and Perl hacking point of view, but USB and LCD panels were both new to me. I didn't help that the box I'd been given to develop on, despite being Fedora Core 2, had USB support removed including a crippled "customised" kernel, but after a re-install (Mandrake 10.0 that happened to be kicking around, but any 2.6 kernel should work) I started to get somewhere. This is half how-to, half diary so that I'll remember what I had to go through to get things working. With luck, it might even help some others out there.
LCDproc/LCDd
I compiled and installed this software, thus generating working drivers on my Linux box, but I don't use the actual software. It can be made to work after changing the configuration (and making sure the configuration actually exists and is in the right place - I used /etc/LCDd.conf and symlinked from /usr/local/etc/LCDd.conf), but I found it unhelpful, and overly complex to write modules for. There are examples to follow, and it's not rocket science, but having to effectively write network clients to display a bit of text offends my more slothful sensibilities.
However, if that's the way you want to go, then configure it thusly:
- Driver=MtxOrb
- Make sure you're running LCDd in background mode (Foreground=no)
in the actual MtxOrb driver, you need to make sure:
- device=/dev/ttyUSB0
(which took me ages to work out, as no-one seems to mention this anywhere.
/dev/usb/tts/0 should also work - note that's an "s" not a "y") - size=20x2 (not 20x4)
- enablebacklight=yes
- contrast=100 (not 140, as this is so bright that it puts boxes around the text)
- speed=19200
- type=lcd
The key mappings are off - I tried PauseKey=L, BackKey=R, ForwardKey=F, MainMenuKey=J with a little more success than the defaults. However, keypad_test_mode=yes stopped LCDd starting up properly, so it's all guesswork.
Horror stories
I'm sure that this is a fine piece of software that will suit a number of people, but for various reasons I chose not to use it. One of the main reasons was that I could write a much simpler program to handle things, so the KISS principal applies. Also, had I started with a box that actually had proper USB support on it, I might not have been quite so annoyed by the time I got LCDd working, so Your Milage May Vary. However, here's the main gripes I had with it:
- Any manual that leaves things at "these options are self-explainatory" clearly was not written with the end-user in mind, because why would they be reading the driver section of the manual if it was so obvious? It took me many attempts to get the right device (/dev/ttyUSB0, not /dev/lcd or whatever)
- The config also defaulted to foreground mode, which made it difficult to run test programs. Actually I had it worse than that - I put the startup scripts in rc3.d as instructed in the INSTALL file and, when the panel didn't work, rebooted the box (must have been using Windows too much recently), which necessitated another restart in single user mode to fix it when I couldn't continue bootup by CTRL-C'ing out of it.
- and of course the aforementioned problems with config files, keys and the testing thereof, writing plugins etc.
Anyway, once you've stopped laughing at my mishaps, perhaps we'll move on to some useful programs shall we?
Simple Programs
Note that you will probably need root privileges to access the LCD device. You might also want to grab a copy of the technical manual in PDF format - LK202-24-USB_02.pdf - to check out any options I don't mention.
The simplest way of putting something up on the display is probably just issuing this from the command line:
echo "HELLO WORLD" > /dev/ttyUSB0
You should see HELLO WORLD on the screen, although probably overwriting the MX2 startup screen as you haven't issued the command to clear the screen first. We'll get to that later, or if you're really lazy, pad with spaces.
Checking the LCD is plugged in
The first program I wrote was to check if the correct LCD panel was connected. There are simple checks you can do, but I wanted to do it the fancy way. However, walking before we try running, here are the simpler ways first.
From the command line, you can issue the lsusb command to list devices. You should see something along the lines of...
Bus 002 Device 002: ID 0403:fa01 Future Technology Devices International, Ltd
The fa01 part is the correct ID for the MX2 or 3 according to page 7 of the technical manual, so we have our LCD device connected. From Perl, you can check to make sure there's any LCDs connected by doing a -e check on /dev/ttyUSB0 - or, you could do a -w just before you try to write to it.
However, for my more complex check, I decided to parse the contents of /proc/bus/usb/devices, simply because you can get a lot of info from it. It lists details on all USB devices, including host controllers etc. but the one we're looking for goes something like this...
T:  Bus=02 Lev=01 Prnt=01 Port=01 Cnt=01 Dev#=  2 Spd=12  MxCh= 0
D:  Ver= 1.10 Cls=00(>ifc ) Sub=00 Prot=00 MxPS= 8 #Cfgs=  1
P:  Vendor=0403 ProdID=fa01 Rev= 4.00
S:  Manufacturer=Matrix Orbital
S:  Product=MX2/MX3
S:  SerialNumber=00006881
C:* #Ifs= 1 Cfg#= 1 Atr=80 MxPwr=500mA
I:  If#= 0 Alt= 0 #EPs= 2 Cls=ff(vend.) Sub=ff Prot=ff Driver=ftdi_sio
E:  Ad=81(I) Atr=02(Bulk) MxPS=  64 Ivl=0ms
E:  Ad=02(O) Atr=02(Bulk) MxPS=  64 Ivl=0ms
So, I wrote a little something like this...
#!/usr/bin/perl

#Initialise some variables
$block="";
$bus=-1;
$device=-1;

# Check if we can read the device list
if (-r "/proc/bus/usb/devices") {
  # open devices list and dump it to $block
  >open INPUT, "/proc/bus/usb/devices";
  $block.=$line while ($line = <INPUT>);
  close INPUT;

  # find listing for each device and go through them one by one
  while ($block =~ m~(T:.*?\nE:)~sgi) {
    $dev=$1;

    # is this a Matrix Orbital MX2/3?  If so, grab the other details from this device
    if (($dev =~ m"Manufacturer=Matrix Orbital"si) && ($dev =~ m~Product=MX2/MX3~i)) {
      $bus    = $1 if ($dev =~ m~Bus=0?([0-9]+)\s+~);
      $device = $1 if ($dev =~ m~Dev#=\s*([0-9]+)\s+~);
    }
    # found an MX2/3?  Might as well stop the loop.
    last if ($bus > -1);
  }

  # if details are found, print it
  if (($bus > -1) && ($device > -1)) {
    print "Matrix Orbital MX2/3 found on Bus$bus Device$device!\n";
  } else {
    # Otherwise, report a failure
    die("Matrix Orbital MX2/3 not found");
  }

# If the device file *couldn't* be accessed at the start, complain.
} else {
  die("Couldn't read device list");
}
As you can probably see, the computer's device list is read as if it is a file (which is the beauty of the Linux /proc system) a line at a time and put in to $block. This is then read to find each chunk between "T:" and a line beginning with "E:" (the E: lines aren't very interesting, so I simplified the regular expression by omitting them). This chunk ($dev) is then read to see if it's the product we want by the manufacturer we want. If that's the case, the chunk is checked for the bus and device numbers, which are then set as $bus and $device so they can be printed (or otherwise used) later. The check is in a while loop, which will keep going as long as there are matches in the device list, so there's a last command to break out of the loop as soon as a match is found. Obviously I'm not taking into account multiple displays and so on. Anyway, after the loop is over there's a check to see if the bus and device settings have been changed since they were initialised at the start, and if so their settings are printer to screen. Simple!
Writing useful information to the screen
If you're adding an LCD panel to Linux, chances are you'll want to display how system resources are being used. There are a number of interesting things we can output - how full the discs are getting, how many emails are waiting in a queue, perhaps even read (and write) IP addresses. However, one of the most useful commands we can use is uptime, because it gives us several bits of useful info for the price of one.
[root@eve root]# uptime
 14:16:51 up 80 days,  3:21,  2 users,  load average: 0.03, 0.00, 0.00
After the current time, it tells us the amount of time the system has been running (i.e. the uptime); but then it goes on to tell us how many people are logged in (e.g. via SSH or directly with a keyboard and monitor), and then how much load the system is under. Actually the load averages are done three times, so you can see how loaded the server is now and what the rolling averages are for the past few minutes, but we'll just use the first result.
There are a couple of cheats in the following program. Firstly, page 29 of the technical manual (in the section "Miscellaneous Commands") tells us that command 7.1.2 is "clear display", and the numbers 254 88 are printed next to it. All this means is that print LCD chr(254),chr(88); will clear the screen, but as I use it three times in the following program I defined a subroutine containing just this one line, for easy access. It's handy to know about these character print statements though - for instance, you can use them to turn on cursors and move it around, change the contrast and so on.
The other cheat is possibly a little dangerous while you're starting out - I use the Perl select command so that, every time something is printed, it goes to the file handle assigned to the LCD screen rather than the monitor or SSH terminal you're using. Things are set back to normal with select STDOUT. I did this because I'm lazy - there are 6 print statements, so typing print LCD every time is just dull. If you're having problems, you could remove the select lines and use the proper print LCD "Uptime:\n"; etc.
#!/usr/bin/perl
# open a file handle so we can write to the LCD screen
open LCD, ">/dev/ttyUSB0" or die("Couldn't open connection to USB device");
# clear the screen - we'll do this 3 times, so use a subroutine
clear_screen();
# get the contents of the system command "uptime"
$uptime=`uptime`;
# pick out the relevant bits - uptime, users and current load average
if ($uptime =~ m~up\s+(.*?),\s+(\d+)\s+users?,\s+load average: ([0-9\.]+),~i) {
  $uptime = $1;
  $users  = $2;
  $load   = $3;
  # use the LCD file handle as the default print handle
  # - instead of each print statement starting LCD,
  # this is quicker.
  select LCD;
  # clear the print our info,
  # wait for 5 seconds before moving on,
  # clear screen before printing more info.
  print "Uptime:\n";
  print "$uptime\n";
  sleep(5);
  clear_screen();
  print "Users:\n";
  print "$users\n";
  sleep(5);
  clear_screen();
  print "Current Load:\n";
  print "$load\n";
  sleep(5);
  # Now we're done printing to LCD,
  # let's go back to STandarD OUTput
  select STDOUT;
}
# We're finished writing to the LCD, so let's be neat
# and close the file handle we opened at the start
close LCD;

sub clear_screen {
  print LCD chr(254),chr(88);
}
Well, we're getting there... although there's a number of reasons why this isn't an ideal program to use for more than testing purposes. It's monotasking, so you can't continue typing commands in while it's running (although if you add " &" at the end of the command to run it - e.g. ./lcdprint.pl & - it'll help). It also doesn't loop, so it'll print the info once and then quit. The output of the uptime for a system that's been on a while is a bit messy too (too many spaces), but that's just cosmetic.
However, that's where I'm going to leave things for now - because next up are the not-so-simple programs!
Oh, all right. Here's one more simple program - lcdflash. Go on, have guess what it does? It achieves it by yet more chr(x) printing, check page 29 of the technical manual.